Category Archives: Class Notes

Class 05 – Masks, Parenting and Comps

Inspiration


Shape layers expanded:


Trim Path (Draw on effect) :


This was our pets reference for today:

https://www.pinterest.com/johnnyhorshack/rockin-animals/


Most Important tutorial for this class – Precomps:


Parenting

If a child needs to cross a road, he reaches out his hand to a parent.

This is the same with AE layers:

You always connect the “child” layer to the “Parent” layer.

Wherever the parent moves – the child moves.


  • To parent layers (or a group of layers) to another layer on the timeline:
    • select the child layer(s)
    • use the @ icon in the Parent column (to the left of the layer name) to drag and drop over the parent layer
    • OR select the parent layer name from the drop-down menu in the Parent column


http://tv.adobe.com/watch/learn-after-effects-cc/using-shape-tools-to-make-masks/


Character animation:


Class #02 – Introduction to Animation

What is animation?

What’s your favorite animation and why?


Animation is all about space and time – watch this TED talk:


Disney’s 12 Principles Of Animation:


Extra reading:


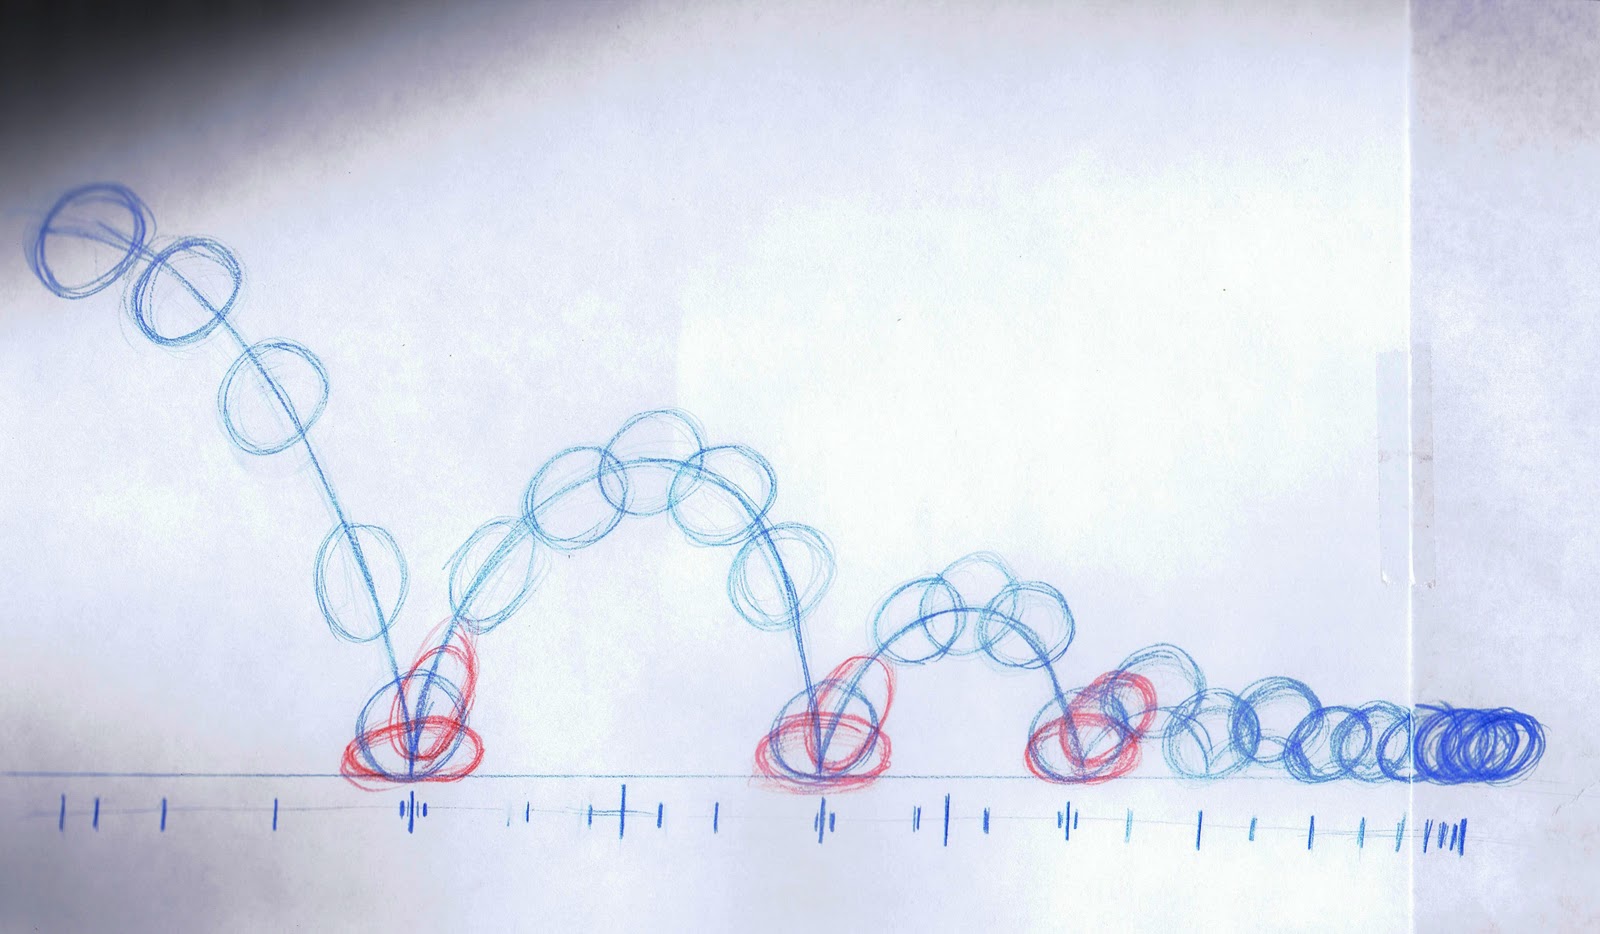
Timing for a bouncing ball animation

4 Basic principles of animation:

– Timing

– Squash and stretch

– Motion arcs

– Slow in Slow out ( top)


Bouncing ball theory

http://2.bp.blogspot.com/-AI-flwRhiG0/TWMyvWQ7TnI/AAAAAAAAAbA/Nv6A_ffgj9Q/s1600/ball+bounce+thought+process.jpg


Tutorials


Another Technique:


Keyframing  Guide:


Graph editor tutorials:


Advanced:

Lesson 3 – Keyframe Types

Precomping in After effects:


EASE IN /EASE OUT / EASE-EASE

Temporal keyframes & Spacial keyframes

Roving Keyframes:

http://greyscalegorilla.com/blog/tutorials/guide-to-keyframes-in-after-effects/

Copy – Paste Keyframes:


Orient to Path ( ’11:20 ):

Roller coaster animation:

Keyframing tutorials:

http://cgi.tutsplus.com/tutorials/keyframing-tips-for-adding-weight-to-basic-shapes–ae-23969

Basic training:

http://cgi.tutsplus.com/tutorials/after-effects-for-beginners-effects-animation–ae-206


Week #02 Class Notes

Project organization 

  • When media is imported into After Effects, it does not become part of the AE file but rather “links” to the AE file from its location on the hard-drive. It is very important to maintain a consistent folder structure for every project, or you will lose the links to your imported assets.
  • Create an organized folder structure for each project you work on.
  • Never re-name or move your folders and imported assets.
Basic Interface: Project, Compositions, Timeline, Preview and Tools 
  • To close a window, highlight it by clicking inside it (make sure you see a yellow outline around the window you selected) and click the “x” symbol in the upper right corner.
  • To open a window, select it from “Windows” in the main AE menu bar (top of screen).
Composition settings 
  • When beginning a new project, be aware of your final output requirements (web, broadcast, projection, etc).
  • Some important specs to be aware of are: resolution, pixel aspect ratio, frame rate, duration
  • In this class, your composition settings will be:
    • HDV/HDTV 1080 29.97 fps Progressive
    • resolution: 1920 x 1080
    • pixel aspect ration: square pixels
    • frame rate: 29.97 frames per second
    • Progressive (non-interlaced)
  • Zoom in/out of Composition Window: Cmnd & + or –
Importing media: still images, video, audio 
  • option 1: File > Import > File
  • option 2: Right-click in the Project window; Import > File
  • option 3: Select Project window; Cmnd & i
Working with layers on a timeline 
  • To bring images, videos and audio files from the project window into the composition:
    • click-drag an asset from the project window and drop it into the composition window (this will give you the option of positioning the asset using the mouse)
    • click-drag an asset from the project window and drop it into theleft side of the timeline (the asset will appear in the center of the composition and at the beginning of the timeline)
    • click-drag an asset from the project window and drop it into theright side of the timeline (the asset will appear at the center of the composition but will give you an option of choosing the desired place on the timeline using the mouse)
  • duplicating a layer: select layer; Cmnd & D
  • copying a layer: select layer; Cmnd & C
  • pasting a layer: select layer; Cmnd & V
  • zoom in/out of the timeline: + or –
Preview
  • To preview your animation, always use RAM Preview: first button on the right side that looks like an arrow with three lines behind it or 0 on the numeric pad. Only RAM Preview allows you to view your animation in real-time.
  • Never use the simple Play button: third button from the left or spacebar. Your playback will not be in real-time and you will not hear sound.
  • Be aware of your sound settings in the preview window: if you can’t hear audio during playback, check to see if your sound icon is turned off.
  • Make sure you are using the desired playback mode: second button from the right. There are three different options for playback: beginning to end once; beginning to end loop; beginning to end then end to beginning (playing backwards).
Transform properties 
  • anchor point (a)
  • position (p)
  • scale (s)
  • rotation (r)
  • opacity (t)
Using audio waveforms as a rhythm guide 
  • Use the waveform of an audio file to help you find rhythm cues for animation timing
  • Thinner parts of the waveform represent a lull in the sound while high peaks usually indicate a beat
  • To access the waveform open the sound layer (by clicking on the arrow symbol to the left of the layer name); open Audio; open Waveform; roll over the thin grey line below the waveform and pull down to expand the waveform size.
Solid layers:
  • Solid layers are a powerful tool. They are vector based, and can be scaled beyond 100% without pixelation issues. Using AE native elements saves you from having to deal with file-linking issues.
  • To create a solid layer in After Effects, go to Layer > New > Solid
  • To modify the solid layer you created, select it and go to Layer > Solid Settings